I was asked how I made Thing 1's cuddle swing, and I started to write it out, but the instructions that made sense in my head came out a garbled mess when I wrote it. So I'm going the picture route to make my rambling easier to understand.
The supplies for the actual swing are pretty simple. I used 2 yards of Lycra(which I got on sale, or you can save one of your fabric store coupons for it since it's about $12 a yard)and 2 steel rings, 2 to 2 1/2 inches in diameter.
If you have a single center hook for your swing this is actually pretty simple, just slide one end of the fabric through the ring, overlap the edges, and sew them up. Ta da, a loop of fabric that serves great as a swing. If you have two hooks or a support bar, like us, then you'll need to modify it a bit.
For these pictures the atrocious fabric Thing 2 chose for a pair of shorts will play the part of the Lycra fabric, and a pipe cleaner will be playing the role of a steel ring...
First you lay the fabric out flat. Fold the ends over, line the edges up, and mark where the end of the fabric is: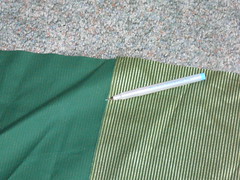
I gave myself plenty of space to work with, and had about a foot of fabric from the fold to the end. There's going to be a lot of bunching, so I was just trying to make it as easy on myself as possible.
Then, slide the fabric through your ring, like so: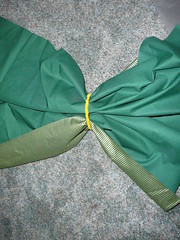
Start at one edge and match up the end with the line you drew, pinning in place as you go: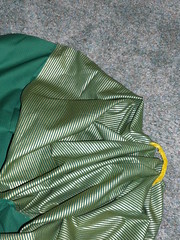
Then you sew. Take your time and do a little at a time so you can keep it relatively flat. It was actually easier than I thought it would be as long as I didn't try to rush it. Use a ballpoint needle or a needle that is very dull so you don't snag the fabric or you will end up hating this project with every fiber of your being. I sewed across the fabric 3 times just to make sure it was secure enough.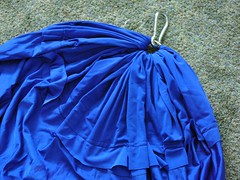
After I finished one side I took it to the doorway and hung that side. Then I found something heavy to put in it and played around to figure out how far the other side should be folded over. The bottom of the swing has to be low enough for them to pull it down or you will have to help them in every time, but it can't be too low or they'll hit the ground once they're in. It hits about chest height with Thing 1 so he can pull down the edge and flop himself in, and he has 3 or 4 inches clearance from the ground when swinging.
As he gets bigger and the fabric stretches I will either have to take out the seams and sew it again or just buy more fabric, which is probably what I will do since Thing 2 and Polka Dot are light enough they will be able to use this one for a while. That's the best part, this is something everyone can enjoy!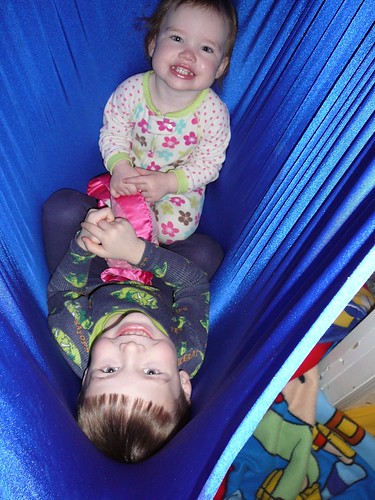
If you thought this was useful, check out the post on making a weighted blanket
Tags for searches: Homemade, home made, diy, do it yourself, sensory therapy, SPD
How to make a cuddle swing
Monday, May 04, 2009Posted by Mo at 8:24 AM
Subscribe to:
Post Comments (Atom)
4 bits of wisdom:
This looks awesome! Found you by way of Google and searching for a DIY weighted blanket. Thanks for both tutes! I am wondering how much weight you have tried in this? My sensory kid is about 55 lbs soaking wet. Thanks again for posting them both!
Just had my boy weighed and he's right at 60 lbs. His blanket is 6 lbs and once it's stacked with his 3 other blankets(in a specific order, of course!)it works perfectly. It's also light enough we can take it on trips, while a larger blanket would make that difficult.
I made a weighted blanket for my son and he is 40 lbs and we went with the 10lb as his OT suggested and he loves it and it works great!
Thanks or the idea on how to make the swing! I really did not want to buy one.
WOW! Thank you, your different perspective on making one helped me plan out how to make mine a little better. I'm a "Mo" too, so I was intrigued to read that after I read through your post. Fun blog! I found your post on finding out about your son having SPD - I loved what you said about feeling good after a professional told you that trusting your mom instincts was best. That's what led me to finding out about SPD for my son. Thanks for your blog!!!!
Post a Comment